Settings and Processing Points

Set this up before drivers start collecting institution items. These settings decide whether G2G is available, how items are received at the processing point, and which delivery service is used when received items become normal delivery orders.
Turn On Transfer Manifests
- Sign in to the tenant admin portal.
- Open System Settings.
- Scroll to the Transfer Manifest section.
- Turn Enabled on.
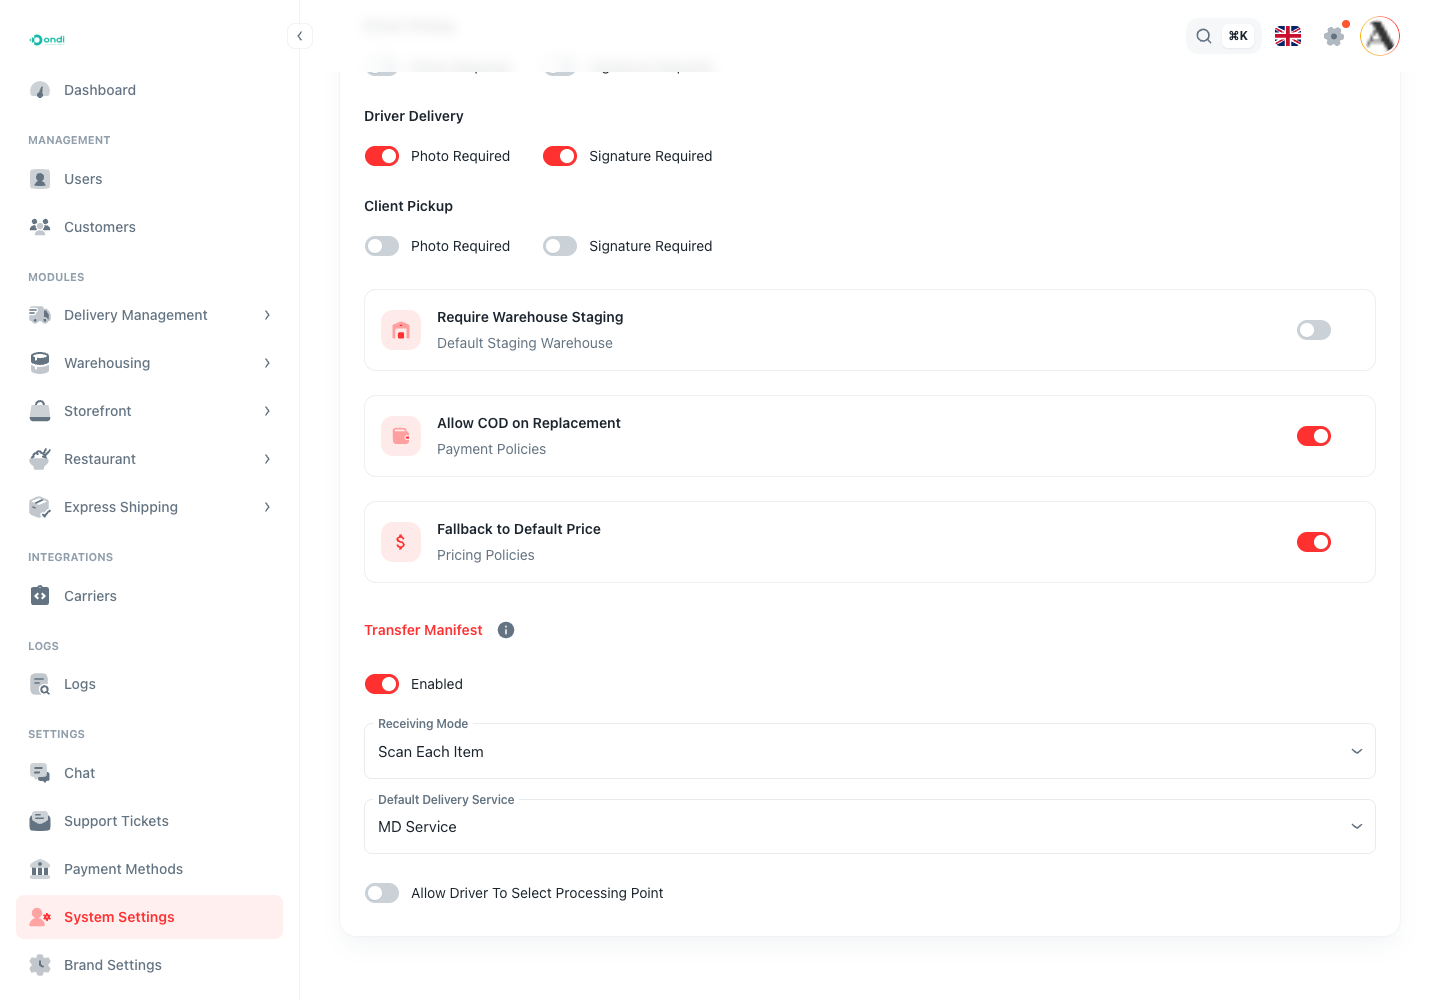
Leave this section only after the Transfer Manifest switch is enabled and the required dropdowns have values.
Choose How Receiving Works
Use Receiving Mode to choose how processing staff confirms the driver handoff:
- Scan Each Item: staff scan or search each barcode that physically arrived. Use this when item-level handoff accuracy matters.
- Count Only: staff receive by item count. Use this only when your operation does not need barcode-by-barcode receiving.
For most G2G operations, start with Scan Each Item. It gives the cleanest audit trail when an item is missing, duplicated, or damaged.
Set The Default Delivery Service
- Open the Default Delivery Service dropdown.
- Choose the service normally used for institution items after processing.
- Save the settings if your portal shows a save action.
This service is preselected when staff assign destinations and create delivery orders. Staff can still choose another service when the assignment screen allows it.
If no delivery service is selected and staff cannot choose one in the assignment modal, order creation can be blocked.
Decide If Drivers Can Choose The Processing Point
The Allow Driver To Select Processing Point setting controls what the driver sees when starting a manifest:
- Turn it off when each institution branch should always go to its default processing point.
- Turn it on when drivers are allowed to choose from available processing points during pickup.
If you turn it off, make sure every active institution branch has a default processing point. Otherwise, the driver may not be able to start a manifest for that branch.
Review Existing Processing Points
- From tenant admin, open Delivery Management.
- Open Processing Points.
- Confirm each receiving location is active and has a recognizable name, code, and address.
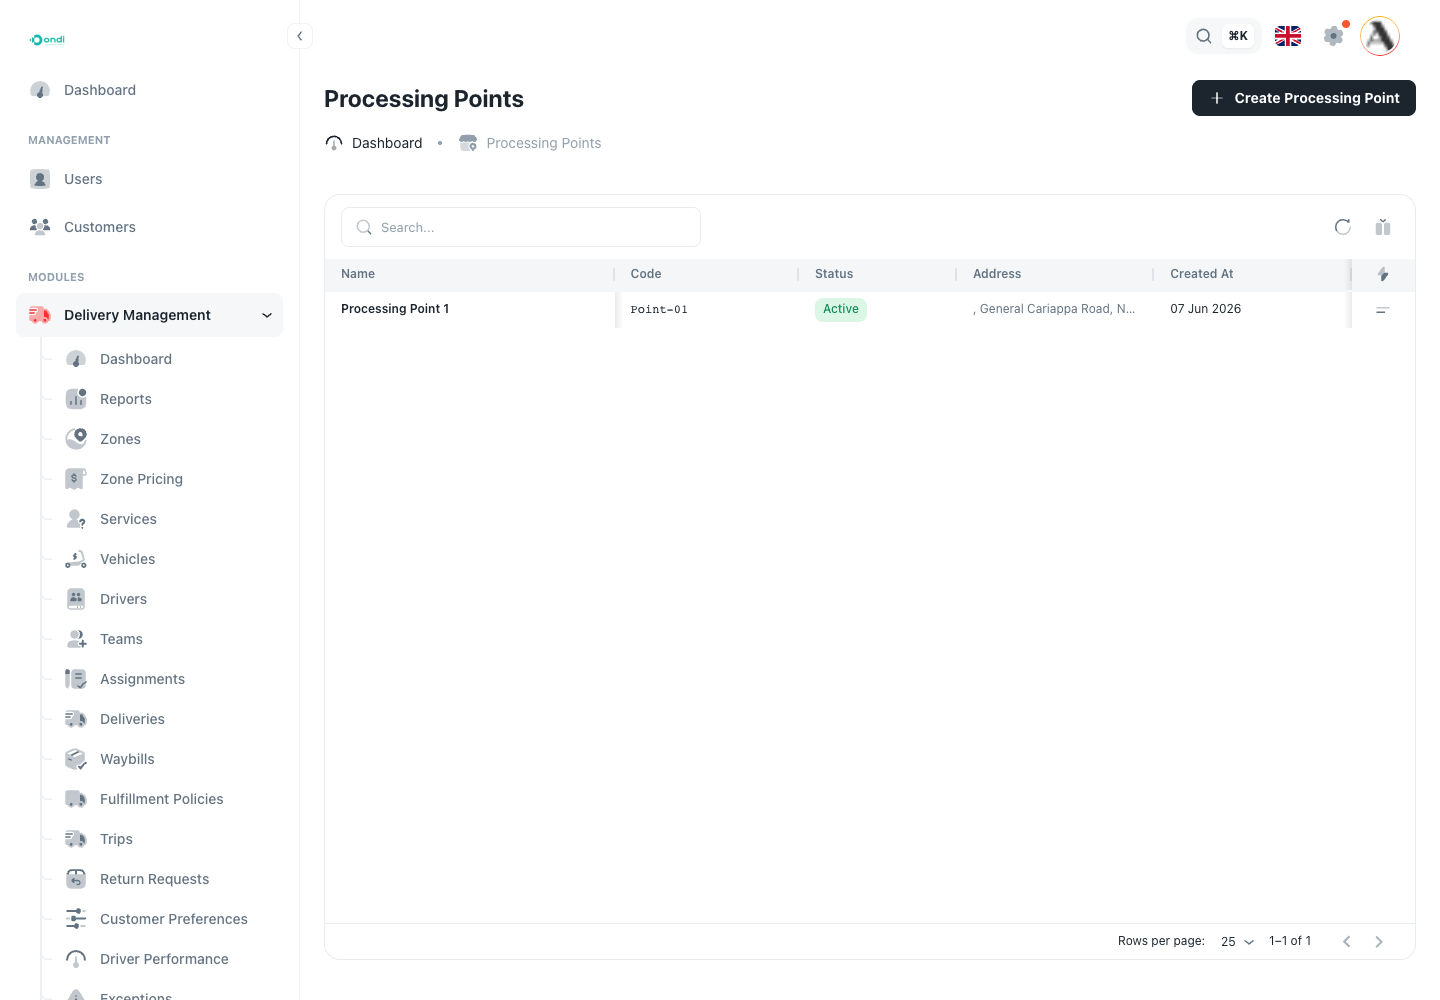
Use short names and codes that dispatchers, receiving staff, and drivers can recognize quickly.
Create A Processing Point
- Click Create Processing Point.
- Enter the processing point Name.
- Enter a short Code.
- Add the Address.
- Click Create Processing Point.
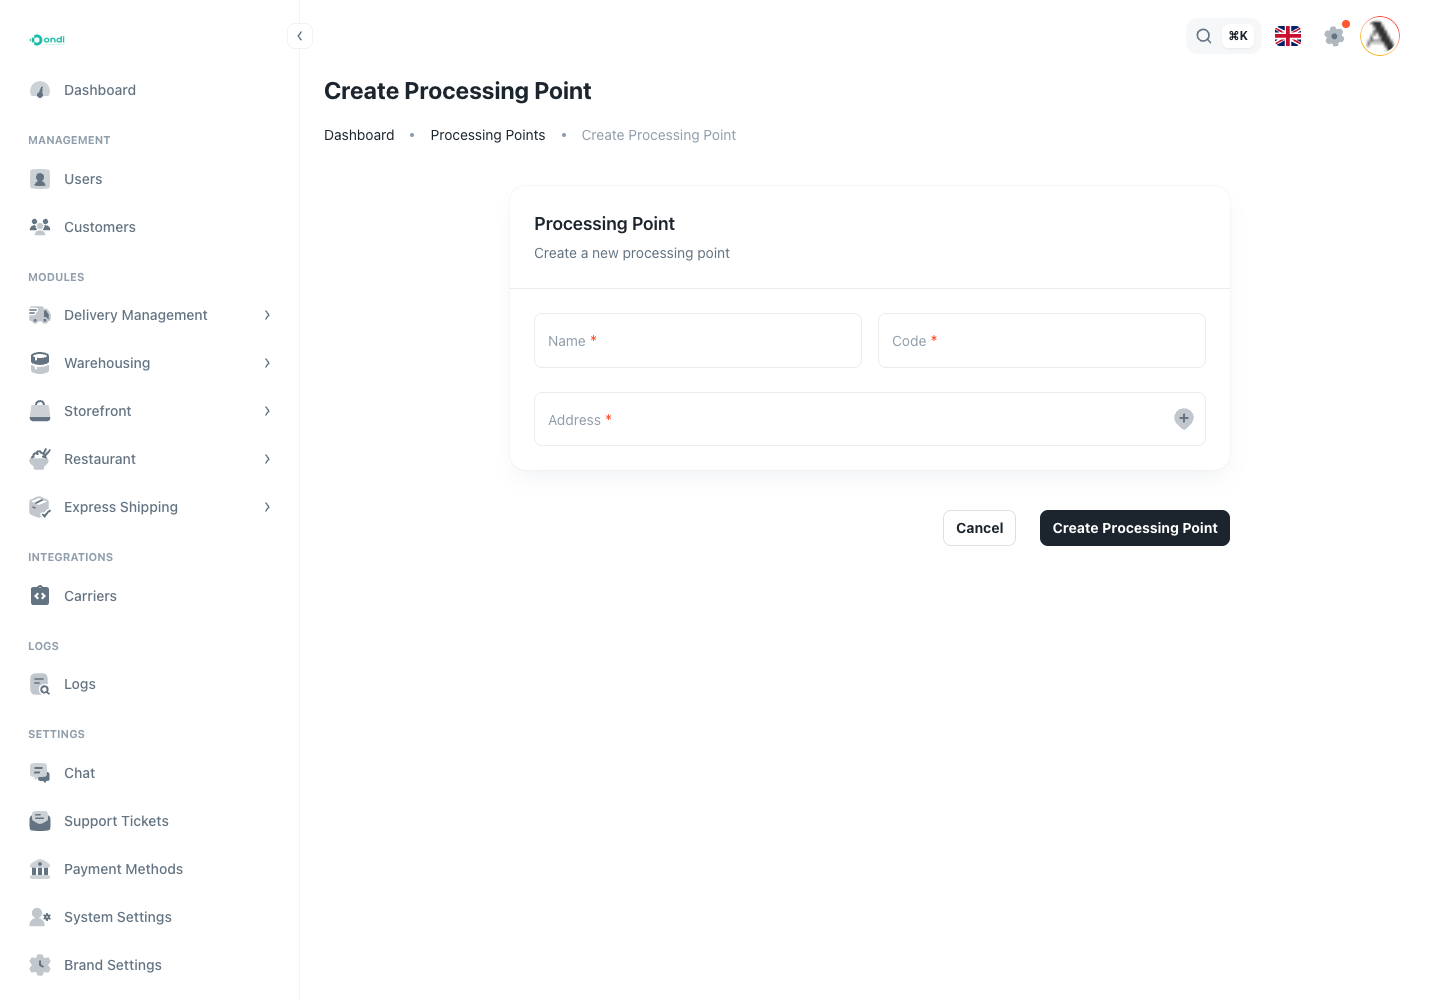
The address should be the receiving location where drivers hand off institution items. If your operation has multiple sorting offices or receiving desks, create one processing point for each location users must choose from.
Connect Branches To Processing Points
Processing points become useful when they are linked to institution branches. You link them from the institution user detail page, inside the branch/location setup.
The next setup step is to create an institution customer and add its branches.
Setup Checklist
Before training drivers or processing staff, confirm:
- Transfer Manifest is enabled.
- Receiving mode matches the real receiving operation.
- A default delivery service is selected.
- At least one active processing point exists.
- Every active institution branch has an address and default processing point, unless drivers are allowed to choose the processing point.
- Drivers can see the Transfer Manifests option in the driver app.